The LX3000/LX4000 Print Head is printing with Poor Quality, Banding, Streaks, or Missing Colors.
You may need to replace your print head. The nozzles can wear out over time.

Tip! Leave the printer powered on when it is not in use to maintain cartridge readiness!
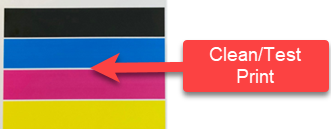
1. Clean / Test Print. Print the Clean/Test Print described in this article.
Send us a picture of the clean/test print!
2. Replace the Print Head. Depending on the results of the test print above, you may need a new print head. It could be under warranty, but it is always a good idea to have a backup print head on hand. See #6 below for warranty information. You can purchase a replacement here:
3. Ink is not flowing to the print head from the tanks. View this article for information on how the ink system works. The side tanks feed the print head ink through the tubes. If this is not working you will be able to print normally until all of the ink in the print head is gone (100 - 200 prints depending on image size). If you don't have a good seal on one or more colors, the ink will not flow from the tank on the side. The tubes leading to the top of the printhead should be full of Ink. If they are clear, that means the ink is not flowing. The result would be that color is missing in your print. Once a print head loses all of its ink, it is impossible to recover it. You will need to purchase a new print head or request one from tech support under warranty. There are several reasons for this problem.
- Cracked or Missing Nozzles. Nozzles under the print head lid should be present and intact. If you close the lid with too much force or with the print head in the wrong position, it is possible to crack or break the lid nozzles. If Nozzles are cracked or missing, the printer will need repair or you may purchase a replacement lid.
- Missing Gaskets. The gaskets on the print head should be installed. See the picture below. If the gaskets are missing and cannot be located, you will need a new print head.
- Air Bleed due to Infrequent use. If you use the printer only once per week or less, air will bleed into the ink tubes. When you start to print again, this air gap is transferred into the print head until the ink from the tanks connects with the printhead. During this time, only ink from the print head is used to print. The print head only has 14ml of ink and cannot be refiled by the tank once it is empty. So if this process is repeated, one or more colors can be depleted from the ink tank. Follow the prevention tips below.

Send us pictures like the ones you see above if you are unsure!
4. Prevention. If there are no visible cracks, missing gaskets, etc., as discussed in items 2, air may have bled back into the lines between uses. This printer works best when it is used every day. If it is several days or weeks between print sessions, air can bleed back into the system, and the ink falls back down into the reservoirs. This creates an air gap in the line that has to be refilled again. While it is refilling only ink from the print head is used for printing. Each time this occurs, the ink in the print head is depleted by 2 ml. After approximately seven cycles, one or more colors of the print head will be empty. If this occurs, a new print head must be installed. There are several things that you can do to prevent this.
- Leave the printer powered on when it is not in use. The printer will perform maintenance to keep the print head nozzles clean and the ink lines full. Leave it plugged in, powered on, with the printhead installed and the cover closed.
- Update your software/firmware.
- Request a repair to have the latest hardware updates installed that may prevent this issue.
- Set your maintenance frequency to every 10 labels and increase your Maintenance Spits to 2.
5. Print Head Manual Cleaning Procedure:
Important Note: This cleaning procedure can be performed a maximum of 8 times before the print head must be replaced. See this KB article for an explanation.
1. Fold a paper towel several times and completely saturate it with warm water or isopropyl alcohol if available. Do not squeeze out excess water from the paper towel.
2. Press the cartridge nozzles to the wet paper towel for 1-5 seconds.
3. Tap the top of the cartridge firmly with your fingers.
4. Repeat until all three colors are visible on the paper towel.
6. Print Head Warranty Information
Your Print Head is warranted for a minimum of 4 changes of any one color of the three colors. If your printhead has been used less than this amount and you are unable to resolve the issue with the troubleshooting and cleaning procedures below, contact support to receive a replacement.
To determine your warranty status hover your mouse over the ink levels and note the number of changes for each color.
When the software sees that four tanks of any color have been used, it displays a message that informs you that your print head is now past its warranty and suggests that you replace the print head. You can keep using it until print quality becomes noticeably inferior and the cleaning procedure below does not fix it.
Article ID: 072221
Related Articles
Poor Quality Printing, Banding, Streaks, Missing Colors. My cartridge is defective. What can I do? (LX810, LX910, LX400, LX500, LX600, LX610, IP60, Bravo series, Eddie)
If the cartridge has not been used for some time, the inkjet nozzles may dry out. 1. Clean / Test Print Print the Clean/Test Print described in this article. Send us a picture of the clean/test print! 2. Clean the Cartridge Manually Remove the ...Discs are printing with poor quality or missing colors. (4100 Series)
Try the following solutions: 1. Change the Cartridge. Check your cartridge levels. If the lowest percentage color corresponds to a missing color in your print, replace that cartridge. Even if the software reports that the cartridge has 30% ink ...Discs are printing with poor quality or poor color matching, streaks, banding, or missing colors. (BravoPro or XRP Only)
Discs are printing with poor quality or poor color matching, streaks, banding, or missing colors. (BravoPro or XRP Only) Four print settings affect print quality and color matching on a Bravo Pro or XRP: Print Quality, Disc Surface Quality, Ink ...Poor Print Quality, Blurry Printing, Print Smearing, faded prints, or splotchy prints on my Cookie or Food Item. (Eddie)
1. Clean the Cartridge. Follow the procedures in this article to clean the cartridge. However, instead of using alcohol to clean the cartridge, use distilled or bottled water. Tip! Leave the printer powered on when it is not in use to maintain ...Photos are printing with poor quality or poor color matching, streaks, banding, or missing colors. (IP60)
Many factors can affect the quality of the print. The following are listed in order from most likely to least likely: 1. Quality Setting. There are three printer settings which can affect quality. (Section 4B) - Print Quality - Increase to Better or ...