How to turn your Eddie Edible Ink Printer into a Photo booth
What you will need:
- Photo booth software. Primera recommends Sparkbooth 7. See the tutorial below.
- High Resolution Webcam or DSLR camera. 1080p or greater is recommended for webcams. You may add a webcam to your existing PC/Mac or use the integrated webcam if you have one
- A PC or Mac. Tablet PCs like the Microsoft Surface simplify the setup and use. Most photo booth software supports touch screen interface including Sparkbooth. Sparkbooth does not work with an ipad.
- Eddie Edible Ink Printer. You may use the carousel or manual mode to setup a photo booth but the carousel is especially suited for a photo booth.
- Round Cookies. Any size round cookies from 2.5" to 4.375"
- Tablet Stand. (Optional) If you are using a tablet you may need a tablet stand to hold the screen/computer in position for the photo booth. Example Tablet Stand.
Tutorial: Using Sparkbooth to turn your Eddie into a Photo booth.
1. Download/Purchase Sparkbooth. Go to https://sparkbooth.com/ to learn more. It is a one time fee of $149 (webcam) or $189 (DSLR Canon or Nikon - from their list of cameras. Download the free 30 day trial here.
2. Once you have downloaded the software you will be prompted to enter your unlock code (license key) if you have purchased it or click the Try button to test it free for 30 days. Note: a Sparkbooth watermark will be on every print when using the Trial Mode. Never use for actual event prints.
3. When you open the software for the first time, you will need to change a few settings and import some files before it will work with Eddie. Click the Settings icon to get started.
4. There are many ways to customize the software, but only a few things you need to do to make it work with Eddie.
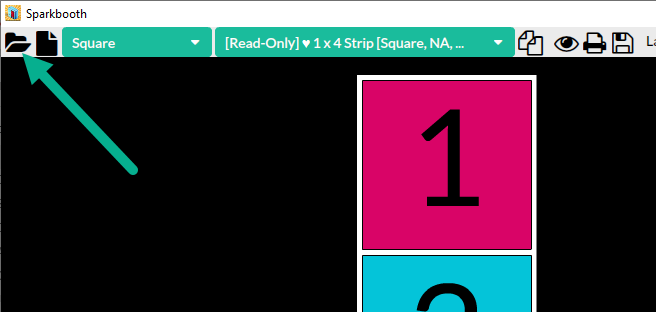
5. Import a Circular Layout. Click Photo Booth (1) - Photo Layouts (2) - Edit Icon (3).
6. Click the folder icon to import the premade custom circular layout for Eddie. You can find this layout file at the end of this article. (Eddie Cookie Round.sbl) After you locate the file, click Open to import it.
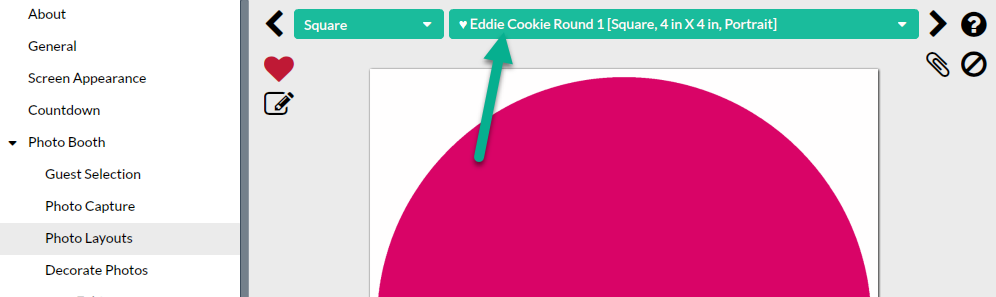
7. The template will be displayed. Click Close to go back to Settings.

8. Eddie Cookie Round template will be the first template on the list. Whatever template is chosen and displayed here will be the default used in the photo booth.
9. Choose the Printer. Under Photo Booth Settings (1) click Printing (2). Check the box for "Enable Printing" (3). Click Printer Setup (4).
10. Select the Drop Down (1) and Choose Edible Ink Printer (2) as the printer. To change quality settings and page size you will need to change the Windows default settings explained later in this tutorial.

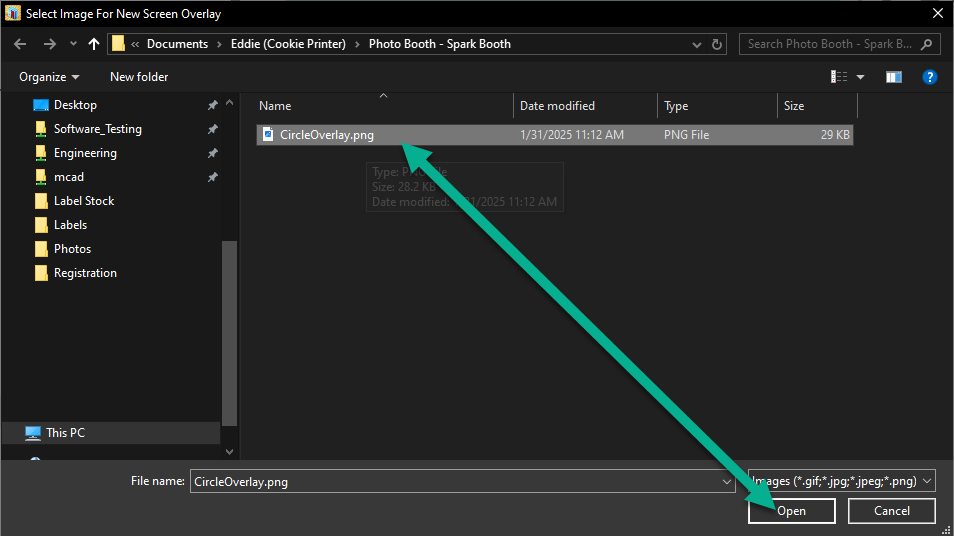
11. Import a circular overlay for the Capture Preview screen. This will cause the user to see a circular preview on the screen instead of a square, so they will know exactly what will be printed. Click Photo Booth - Screen Overlays. Click the + to import a new overlay. You can find a premade overlay file at the end of this article. (CircleOverlay.png)

12. Choose CircleOverlay.png from the downloads folder or wherever you saved it.
13. Set the software to use the overlay for all images (1) and check the box for Apply to Photo (2).
14. Set your page size and quality settings. Finally, set your Windows default page size for Eddie to match the cookie size you will be using. Search for Printers and Scanners. Find "Edible Ink Printer". Choose Manage. Click Printing preferences. Finally, make changes to the Paper Size, Quality and Saturation to match your cookie.
15. You are Ready to Print. Click Close to exit settings and open your capture screen.

16. To take a photo, simply press the space bar to start a visual and audible countdown. When the pictures are taken, they will be automatically sent to the printer.
Tips and Tricks
1. Everything about the capture screen can be changed in the settings. Specifically you may want to add a retake button to the screen. This will allow users to preview the picture before it is sent to the printer. Go to Settings - Photo Capture. Check the Retake Photo box. You can also edit the text of the buttons.
2. Press CTRL + F on your key to toggle between full-screen mode and windowed mode.
3. You can lock out users from changing settings or even closing the software by clicking the screen settings icon and unchecking the box for "Show button toolbar". To get back into these settings and undo this change press CTRL+2. Or you can quickly toggle between modes by clicking and holding your mouse in the bottom left corner of the photo capture screen.
4. To remove the small preview box on the upper left corner, click the screen settings icon and check the box for "Preview Only".
Support
If you have any questions, contact Joe Connell at Sparkbooth Support. He is the support representative who has information specifically about using Sparkbooth with Eddie.
To contact support, go to Software Settings - About Page - Request Support
Joe Connell can help with any issues or if you just need help creating custom a template for different shapes cookies like Heart / Star / etc.
Article ID: 013125
Template Files attached at the end of this article
Related Articles
How to print Red with Eddie Edible Ink Printer.
If your Eddie is printing red that looks more orange, use these tips to get the best possible red. White Frosting/Icing. The color of the printing surface makes a huge difference to the quality and color accuracy of the print. The "whiter" the white, ...Error: The printer couldn't print <Document Name>. Unable to connect to Printer. Printer in Error State. Generic Microsoft Windows Error Printing on Edible Ink Printer. (Eddie) (PC Only).
1. Connect the USB, connect power, and switch the printer on. 2. Print Hub. "The printer couldn't print <Document Name>" This generic Microsoft Windows error may occur after a Windows Update. A more specific error may be displayed in the Primera ...My Eddie ink is past the best by date or is expired. Can it be replaced?
Can Primera replace expired ink or ink beyond the best-by date? Unfortunately, Primera cannot replace Edible ink because it is beyond its best-by date or expired (6 months from the open date). However, Primera will replace any ink cartridge that is ...Can I print wirelessly to my Primera Printer? (LX3000, LX4000 and Eddie)
The Eddie, LX3000, LX4000 or Catalyst can be used out of the box with a USB connection or Ethernet connection. You can purchase a BrosTrend Wifi Range Extender with an Ethernet port to connect the printer to a wireless network. You can then print to ...How do I print from my Photo Booth Software to the IP60?
Photo Booth Software - What Works with IP60? Windows: Booth Junkie - https://www.boothjunkie.co.uk/ -Known Issue: Always prints two 2x6” photo strips when you select printing one. Breeze - https://www.breezesys.com/ (includes Webcam Photobooth, DSLR ...